Configuring and Launching the Instance
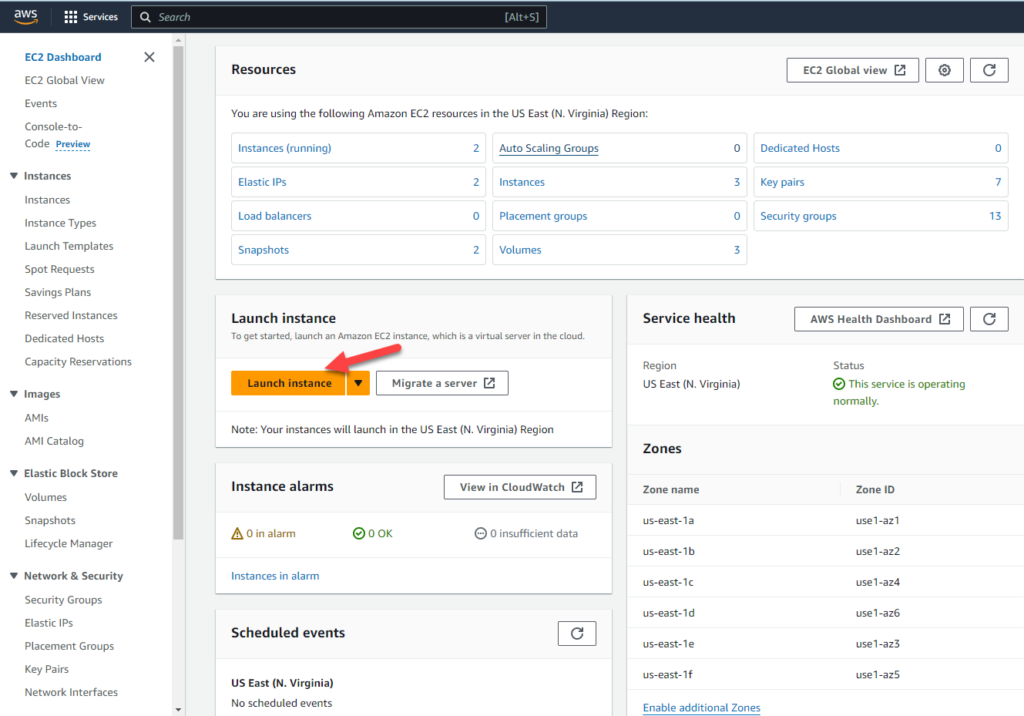
We begin by logging into the AWS Console and and navigating to the EC2 service where we click on Launch Instance.
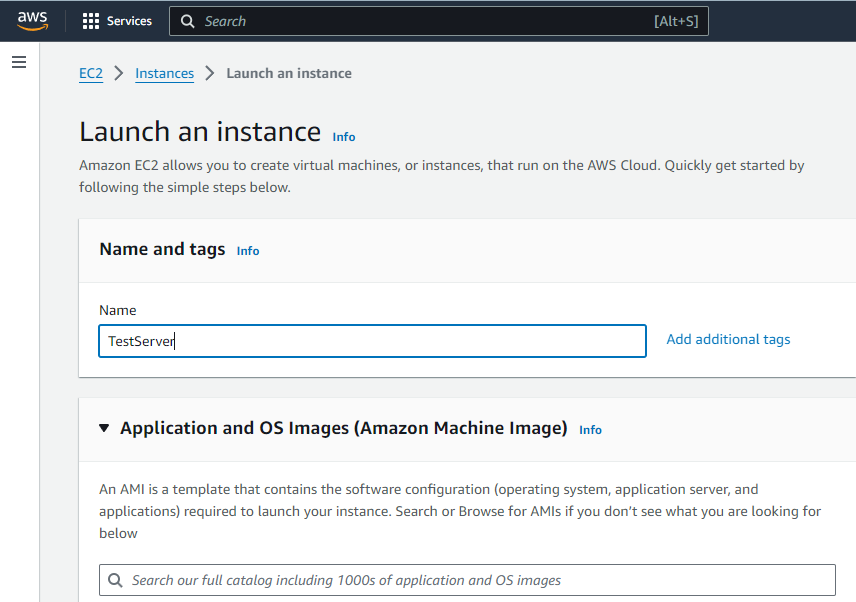
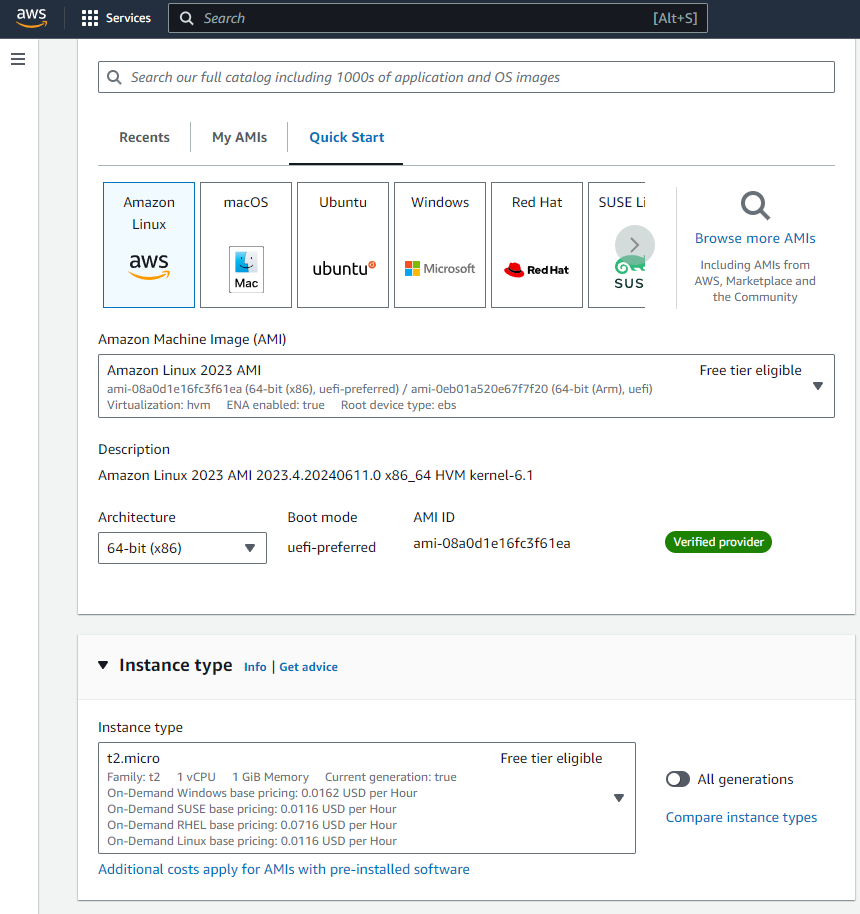
On the following page, we enter a name for our instance and choosing our AMI of choice and instance type. We will go with the latest Amazon Linux AMI and t2.micro, you will need to choose a higher instance type if you require more RAM or Cores.
Next we have to create a key pair or choose an existing key pair. For the purposes of this walkthrough, we will use an existing key pair. If you need to create a new key pair, you can follow the instructions at this URL: https://docs.aws.amazon.com/AWSEC2/latest/UserGuide/create-key-pairs.html. You will also find this guide useful if you need to modify permissions for the generated pem file.
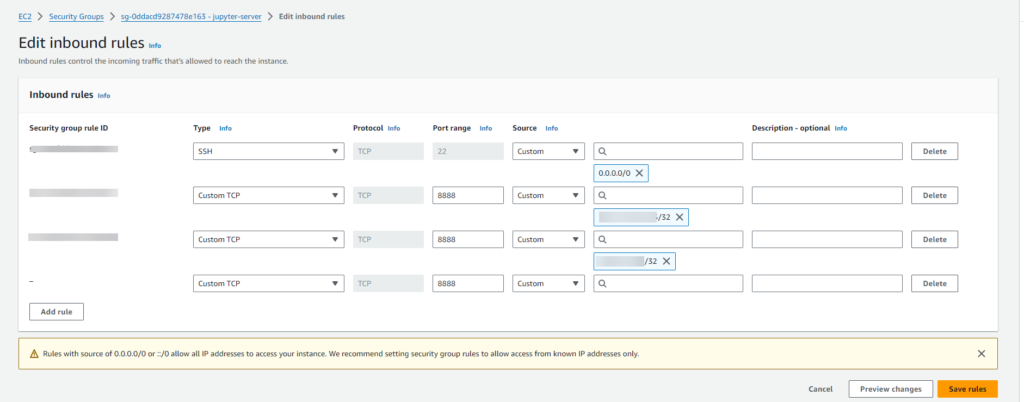
In network settings, it should choose a VPC you have already setup. If you did not set one up before, you will need to create one. We will choose a VPC we already created with basic configuration. To create your VPC, navigate to: https://docs.aws.amazon.com/vpc/latest/userguide/create-vpc.html. If you have not created a security group already, you will need to do so. We will configure the basic SSH port 22 and allow it to be connecited from anywhere (0.0.0.0/0) and the port 8888 for Jupyter-lab to be connected only from specified IP addresses.
In the Configure Storage section, enter the size you want for your root volume. I will use 20gb in case we need to install packages or clone repositories to the server
This should complete this section and we can click on Launch Instance. The instance should take a few minutes to be setup and initialized.
Connecting to the Instance
Click on the Instances from the navigation menu on the left side and click on the instance in the list. There you can find the Public IPv4 address or PublicIPv4 DNS, this is what you will use to SSH into the server.
ssh -i <pem filename>.pem ec2-user@<server-ip-address>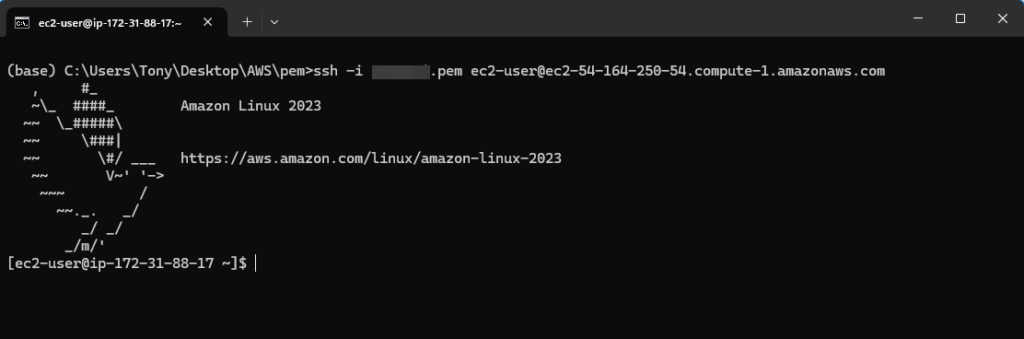
We will first check for and run any server updates available:
sudo yum updateThen we will install pip:
sudo yum install python-pipNow we will create a virtual environment for jupyter-lab:
python3 -m venv pyenvAfter that completes, we will activate the environment:
source pyenv/bin/activateOnce the virtual environment is activated, we can install jupyterlab and notebook.
pip install jupyterlab notebookNow we can jump into setting up the jupyterlab configuration.
jupyter notebook --generate-configWhich writes the config to: /home/ec2-user/.jupyter/jupyter_notebook_config.py
Then we can go ahead and set the password to access jupyterlab when we navigate to it’s URL in the browser
jupyter notebook passwordEnter the passwords in the prompt
This completes the process for setting up jupyterlab. Now we can start the server and test to see if it works.
jupyter-lab --ip 0.0.0.0 --no-browserIn a browser, connect to the ip address of the server with port 8888. e.g. http://54.164.250.54:8888/
To make it easier to launch the server, we can put –ip 0.0.0.0 and set –no-browser in jupyter_notebook_config.py. Using your favorite editor, open the file and modify these lines:
c.ServerApp.ip v = 0
c.ServerApp.open_browser = False
Now we can just type jupyter-lab to start the server. If you want to start the server and run it in the background without shutting it down when you close your ssh connection you can run this command:
nohup jupyter-lab &There are other lines you can uncomment in the config file to set things up like the root directory jupyterlab opens up into.