Windows Task Scheduler is a component in Windows that gives the ability to schedule and automate repetitive tasks in Windows by running scripts or programs at a specified interval. For those who know Linux, this is the equivalent of crontab that is found on Linux.
This is a very simple and useful component that can save you a lot of time. To run the task, you will have to first create a task, create the scheduled interval that will trigger an action that will occur.
1 – Creating Your First Task
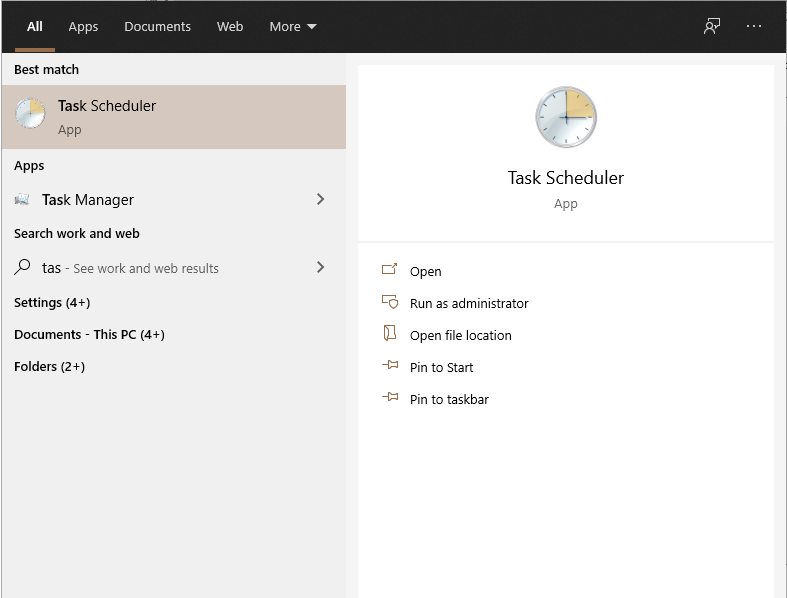
Click the Windows button and search for “Task Scheduler”
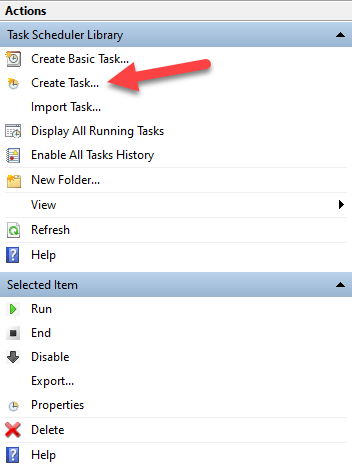
After Windows Task Scheduler opens, on the right side in the Actions pane click “Create Task”…
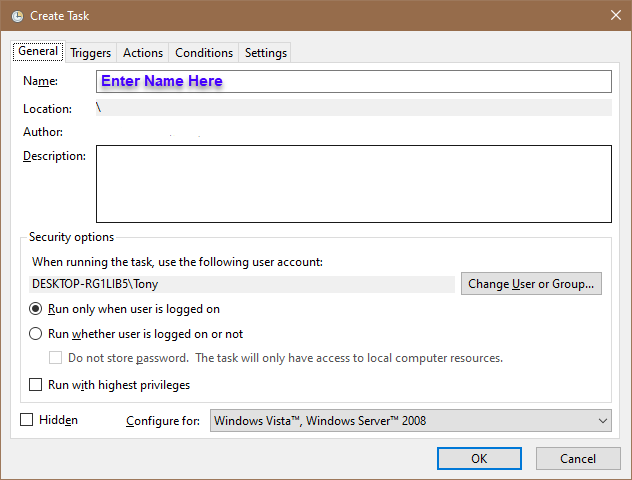
In the “Create Task” dialogue that pops up, enter a name for your Task. You can leave everything else as is.
2 – Creating a Trigger
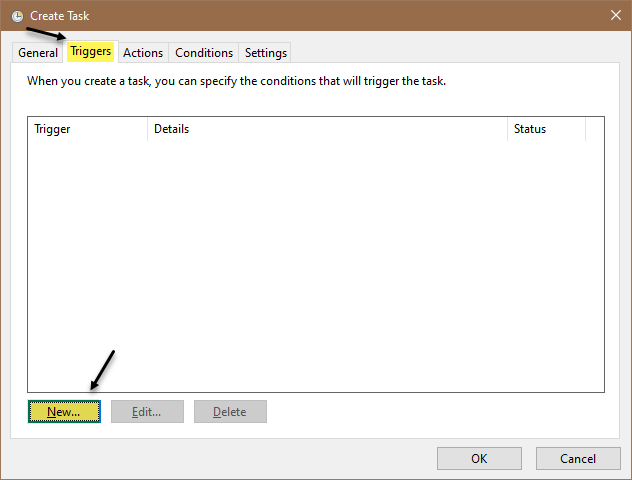
Click on the “Triggers” tab and click “New”.
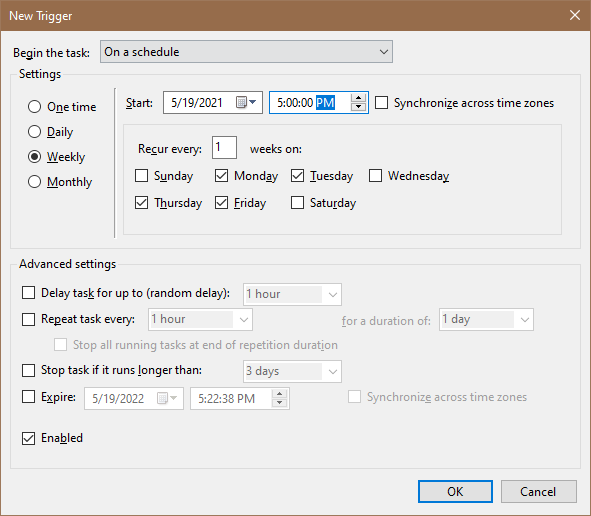
Configure the interval you want to use to trigger your script to run and click “OK” when you’re done. Below is an example of a trigger that runs only between Monday to Friday at 5:00PM.
3 – Creating an Action
Before you do this step, first get the executable file path for Python. You can easily do this by typing where python in command line.

If you want the task to execute silently without popping up a console window, change the line in Program/script from python.exe to pythonw.exe.
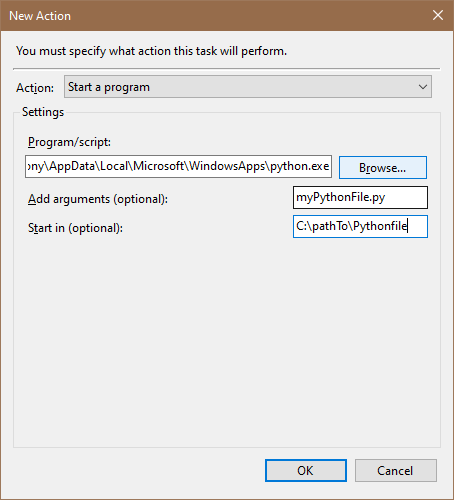
Now click “New” in the “Actions” tab and paste this in the “Program/script:” file. In the “Add Arguments” field, paste the name of the python file you have written and in the “Start in” field, paste the directory path where your Python file exists. When you’re done, it should look something like the below.
Click OK and you’re done!
Feel free to leave any questions!